Macs don’t need third-party utilities like TrueCrypt to create a secure, encrypted container for your sensitive files. You can create an encrypted disk image using the built-in Disk Utility.
Whenever you want to access your files, you can “mount” the image file and provide your password. Whenever you want to lock access to your files, you can unmount the image file.
Create an Encrypted Disk Image
To get started, you’ll need to open the Disk Utility application. Open a Finder window, click Applications in the sidebar, double-click the Utilities folder, and double-click Disk Utility. You can also just press Command+Space to open Spotlight search, type Disk Utility, and press Return to open it.

Click New Image on the toolbar in the Disk Utility window. This will create a new disk image (.dmg) file. Here are the options you’ll need to configure:
- Save As: Provide a file name for the disk image file. For example, if you name it “MyImage”, the container file will be saved on your hard drive as a file named MyImage.dmg.
- Name: Enter a name for the disk image file. This name is more of a description — it will appear as the name of the container when the file is mounted.
- Size: Choose a size for your disk image file. For example, if you choose 100 MB, you’ll only be able to store up to 100 MB of files inside it. The container file will take up the maximum file size immediately — so, if you choose 100 MB, it will take 100 MB of space on your hard drive even if you have no files saved inside it yet. You can enlarge or shrink the disk image later.
- Format: Select Mac OS Extended (Journaled) as the file system.
- Encryption: Choose either 128-bit or 256-bit AES encryption. 256-bit is more secure, while 128-bit is faster. If you’re encrypting sensitive files, you’ll probably want to choose 256-bit and accept the slight slow-down for more security.
- Partitions: Select Single partition – Apple Partition Map to use a single partition inside your disk image file.
- Image Format: Select read/write disk image so you can read from and write to the disk image at any time.

Click Create and you’ll be prompted to create an encryption password for your disk image. Provide a strong password — this dialog will estimate your password strength to help you with choosing a password. If you lose this password, you’ll lose access to the files inside your encrypted disk image. Be sure to pick something memorable.
You’ll probably want to uncheck the “Remember password in my keychain” option. This option will remember the password in your Mac user account’s keychain so it can be automatically filled in the future.

The disk image will be created, formatted, and automatically mounted for you. You’ll find it on your desktop and in the Finder under Devices. To encrypt files, just save them to this device.
To unmount the encrypted disk image, click the Eject button under Devices in finder or right-click or Ctrl+click its desktop icon and select Eject.

Mount the Encrypted Disk Image
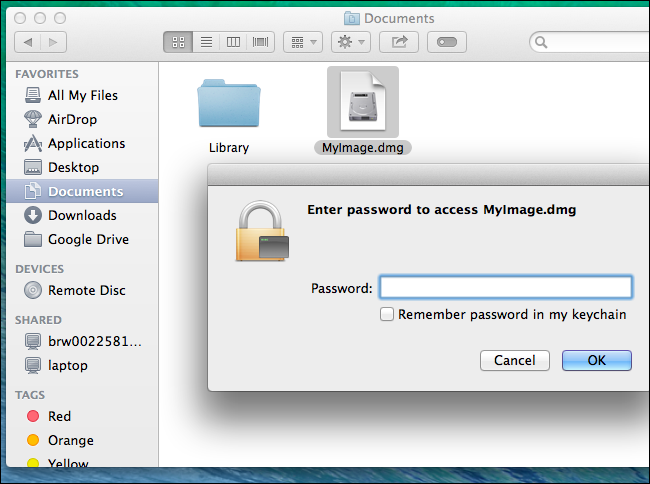
To mount the encrypted disk image in the future, locate its file on your hard drive — it will have the .dmg file extension — and double-click it. You’ll be asked for the encryption password you provided while setting it up.
After you provide the password, you can access the contents of the file just as you would access any other disk image or removable device.

Enlarge or Shrink Your Encrypted Disk Image
If you’re running out of space inside your encrypted disk image and don’t want to create another one, you can enlarge your existing one. Or, if you’re not using the full size of your disk image, you can shrink it to save space on your hard drive. The disk image will take up the maximum amount of space immediately. So, if you enlarge it to 1 GB, it will immediately take up 1 GB of space.
To do this, right-click or Ctrl+click your .dmg file, point to Open With, and select Disk Utility. Select your image file in Disk Utility, click the Resize Image button, and enter a new size for the disk image. You’ll be prompted for your encryption password.
Note that you won’t be able to resize the disk image if it’s currently mounted. If the Resize Image button is grayed out, just click the Eject button in the Disk Utility window.

You can now do whatever you like with your encrypted .dmg file. Keep it on your hard drive, copy it to a USB drive, or even store it online using a cloud file storage service like Dropbox. People won’t be able to access its contents unless they have the password you provided. You can mount the encrypted file on any Mac as long as you have the password.